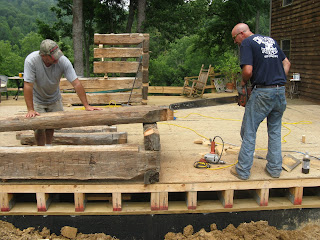


#1 Header Log
#2 Jason Renotching Logs
#3 A Very Tight Fit
#4 V Notch
June 10, 2010
Hello from the Holston,
Today was not as productive as I would have liked it to be, but we are at a point where we are sourcing out replacement logs and floor joists and that's not an easy task. The house had one rotten log, an 18' log and the top window header (22'.6") was missing, don't ask me how, I don't have a clue. Jason was able to pull a couple of logs out of an old barn near Shady Valley to use. The challenge now is to find 6 planed 12' 3x8 beams to use as the floor joists to tie in to the stairwell. We have a couple of options up our sleeves and a few good folks searching around. Hopefully we have a solution within the next week.
So, how does all the log house building work? Well, it's pretty logical really. I'm sure you remember playing Lincoln Logs as a child, it works pretty much the same way. This house is easy to fit together because the notches are "V" notches. The "V" notch is the oldest notch and was used on early log construction and didn't take a real craftsman to make. This notch dates the house from somewhere between 1800 and 1820ish. The house was built with 2 main floor seals, front and back and the logs were stacked from the left and right, corners on another all the way up. It still works the same way but we have removed the bottom seal logs because we have a subfloor for the logs to rest on. We've used heavy silicone and toe nailed the bottom logs to the subfloor. Each corner log is spiked together with a 12" x 1/2" nail, nailing one log to another for stability. The spikes aren't really necessary because the weight of the logs from top down would keep it from shifting...but I feel much better about them being there!
Look at the "V" notch picture, it's amazing how tight the joints are. You can also see how the logs are re-notched where they need to be. The header log you see will be cut for a large opening and the new header log will be on the same level as the floor joists logs. The crew had to use a sledge hammer to shift the house to make the joints fit,,,I was a little worried,,but it worked perfectly.
The electrical boxes will be notched into the logs (not through the chinking) with the wires running straight down to the floor trusses below then into the services box. (I don't know a thing about electricity except how to change a light bulb and turn on a switch,,,,I expect my knowledge base to expand quickly).
Tying the two structures together is going to be the trick. More on that later. Although I'm really excited about the log house construction, I'm really excited about the connector (breezeway). I've pulled out some old architectural materials from the barn to use in this space that will be fantastic.
Thanks for dropping by the project,,,it's always good to see you. Happy Hour is usually around 5 or 6 on Friday, drop by if you can.
No comments:
Post a Comment
Note: Only a member of this blog may post a comment.