Tuesday, June 22, 2010

What am I doing?


How many times do you think I ask myself that during this addition project? The answer is all the time. I have a different way of looking at this project in my mind. Sometimes its in 3-D, sometimes I can see through walls that don't exist yet and most of the time I can visualize the color and texture of the walls, ceiling and floors. Most of the time it works, but sometimes it just doesn't pan out the way I think it should. Today has been one those days. I try to use "form follows function", but sometimes the function gets in the way. I've redesigned the washroom/bathroom 3 times today. I really thought I would have enough room for a utility closet with stackable washer/dryer. Well, the form is just not following the function today. So, I'm compromising on having a beautiful washroom with very unexpected features...without the W/D. And that's okay. I'd much rather have a bubble bath than fold clothes anyway.

The roof guys are here putting down the underlayment for the tin roof. Wow, that's pretty tough stuff they're putting down. It's a synthetic felt, much like house wrap material. They dropped off the flashing, but they need to bring the break to fold in another turn to fit back in the logs. Jason will have to notch out the logs on both sides and slide the flashing in the notch to prevent water from seeping under the roof material. I'm anxious to see how that works. He will cut through the chinking and logs on the existing house and cut through on the addition side.

Tomorrow, Doug and Lee will frame in for the trapezoid windows in the gables of the log house. The windows are HUGE. 61 1/2" x 4'. I can't wait to see them framed in. Last night I was looking at the moon glow from inside the log house, this room will be beautiful both night and day.

That's all for now. I'm getting behind on so many things, weeding, assignments and tests, so I need to concentrate on these things this evening.

Hope to see you soon
Take Care

Nora Belle

Sunday, June 20, 2010

You Got The Right String Baby But The Wrong Yo-Yo


June 18, 2010
It's been that kinda week friends!

This week I've been more than a little worried. At the end of the week, looking back at the some of the problems we've had, they seem very small compared to the progress we've made in just a week. There were times I expected the whole project to come to a screeching halt. At the end of the week, the roof trusses on the log house were on, the exterior stud walls are up, ready for the roof trusses for the breezeway. Jason has notched the logs for the electrical and window and door jambs are ready. The big challenge here has been finding the old forged nails in the logs. Doug and I had a long discussion about making nails. Imagine how long it took to make enough nails to build a house in 1820. They had to be forged,,,think about that the next time you're watching a blacksmith work.
Jason uses a chain saw to square up the openings and has had to resharpen his chain saw several times. A metal detector has really helped (Thanks Ricky). The wiring for the light switches will run through a channel down the door jambs and the electrical wiring for receptacles will run down through the logs, some will run through a channel under floor (which is the ceiling downstairs, 2" tounge and groove) There will be a fake beam running between each floor joist to carry wiring. Next time your here, notice the beam in the dining room, where the lights hang from. It's the same concept.

I learned something new this week about floor joists. Doug is a master builder and he knows how these old codgers built stick and log structures. I was worried about the floor trusses that came from the old McConnell house. (The existing 1896 house where the great room is today). All the trusses had a bow in them and I thought they'd bowed due to the being stored for 20+ years in a barn. The bow in the joist is intentional and is critical to the floor joists - the bow is what gives the joist its strength. Doug calls it a camber or an arch. The span of the joists is 18' across the log house. Think about how strong the arch is in building (just look at the Forum in Rome, or the old bridges in Spain). I'm still not convinced the floor will be level, but at least I know, "it ain't goin' nowhere". Doug says the weight of the floor should make the floor mostly level. If its not, it's just another layer of character.

I'm sure you're wondering what goes in between the two log houses, what it will look like, etc. I'm attaching this link of one of my favorite places (I have so many!), in the Florentine Chianti region, in the little town of Greve, Italy http://www.lacantinettadirignana.it/lacantinetta/index.php I plan on using a lot of the same elements such as the heavy beams and textured walls. The exterior will be stone with a similar look. I hedge between composite stone and real stone for several reasons. I'll make that decision when I need to.

Okay, that's all for this week. I promised the guys margaritas for happy hour. See you soon. Have a great weekend

NoraBelle

What a Week!


June 11, 2010
Thanks for hanging out with me this week.
Is it Happy Hour yet? While the guys are taking a break, I thought I'd send you an update.

Wow, what a week! We started tearing down on Tuesday and by Friday the log structure is up, pinned, joists in, (except for the stairwell joists). Amazing! We've had a couple of logs that have been "twisted" by the southwest exposure, but Jason and his amazing brothers made the logs go where they wanted them to go. We have 3 courses to go and should wrap up this evening around 5ish.

The next step is to power wash the logs and water seal the top and bottom of each log where the chinking goes. This weekend we will debark (although I would much rather embark,,,,sorry, couldn't resist) and seal. Then the floor joists will have to be sanded to get over a 120 years of dirt off and get them ready to paint. I'll give you a lesson in faux painting in a few weeks.

The roof trusses go on Monday. I mentioned earlier tying the two together will be the real trick. I'll show you what that means later too.

I truly appreciate all your interest and your responses to this "little" project. The blueprints are in my head, along with the final result. I know its difficult to see what the final product will be,,,,,,but stay with me baby,,,you'll get the picture.

Okay, I'm not going to write on the blog everyday from this point,,,only occasionally, The exciting part is over and it's time for real work to begin. The devil is in the details, so that's what they tell me,,,we'll see!

Drop by when you can, would love to see you, (and take a break)

First Floor is Complete and How Things Work


#1 Header Log
#2 Jason Renotching Logs
#3 A Very Tight Fit
#4 V Notch

June 10, 2010
Hello from the Holston,

Today was not as productive as I would have liked it to be, but we are at a point where we are sourcing out replacement logs and floor joists and that's not an easy task. The house had one rotten log, an 18' log and the top window header (22'.6") was missing, don't ask me how, I don't have a clue. Jason was able to pull a couple of logs out of an old barn near Shady Valley to use. The challenge now is to find 6 planed 12' 3x8 beams to use as the floor joists to tie in to the stairwell. We have a couple of options up our sleeves and a few good folks searching around. Hopefully we have a solution within the next week.

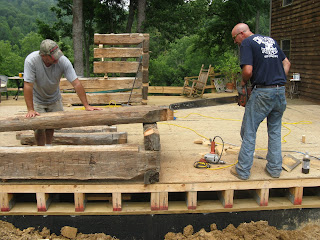
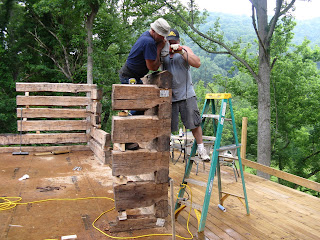
So, how does all the log house building work? Well, it's pretty logical really. I'm sure you remember playing Lincoln Logs as a child, it works pretty much the same way. This house is easy to fit together because the notches are "V" notches. The "V" notch is the oldest notch and was used on early log construction and didn't take a real craftsman to make. This notch dates the house from somewhere between 1800 and 1820ish. The house was built with 2 main floor seals, front and back and the logs were stacked from the left and right, corners on another all the way up. It still works the same way but we have removed the bottom seal logs because we have a subfloor for the logs to rest on. We've used heavy silicone and toe nailed the bottom logs to the subfloor. Each corner log is spiked together with a 12" x 1/2" nail, nailing one log to another for stability. The spikes aren't really necessary because the weight of the logs from top down would keep it from shifting...but I feel much better about them being there!

Look at the "V" notch picture, it's amazing how tight the joints are. You can also see how the logs are re-notched where they need to be. The header log you see will be cut for a large opening and the new header log will be on the same level as the floor joists logs. The crew had to use a sledge hammer to shift the house to make the joints fit,,,I was a little worried,,but it worked perfectly.

The electrical boxes will be notched into the logs (not through the chinking) with the wires running straight down to the floor trusses below then into the services box. (I don't know a thing about electricity except how to change a light bulb and turn on a switch,,,,I expect my knowledge base to expand quickly).

Tying the two structures together is going to be the trick. More on that later. Although I'm really excited about the log house construction, I'm really excited about the connector (breezeway). I've pulled out some old architectural materials from the barn to use in this space that will be fantastic.

Thanks for dropping by the project,,,it's always good to see you. Happy Hour is usually around 5 or 6 on Friday, drop by if you can.

Neither Rain nor......


June 9, 2010
Hello Everyone,
Just wanted to write a quick little post on progress. Wow, what an incredible day! See for yourself.

I've never had a crew that would work in the rain,,,,or even with a threat of rain. You know the story, they'll melt, God Bless'em. Well,,,not this crew! We have worked in the rain all day and I've just loved it.

I'll give you a better description of how this loghouse building stuff works tomorrow, by then the floor joists should be in.
Photo 1 First Log
Photo 2 Drilling logs for spikes
Photo 3 Mountain View
Photo 4 Whew!! Ready for another day.

Dear Nora Belle

Hey, thought I would just post some of these
Nora

You had been quiet for so long I just knew you were up to something BIG! Looks like fun. See you soon.
Pat

cool! NOra, Will it be attached to your existing place?
Skip

That is going to be so awesome that you're going to have trouble getting your guests to leave! Amanda

Very impressive. Good luck with the project.
Bruce & Loretta

whew.....though not an artist, i can look into july, aug, sept and see a long hot summer! please keep us up to date w/ your progress....and maybe we can stop by sometime w/ a lemonade and give our 2cents worth. hugs from the gap.....talk later~~~

Keep up the good work (and find something for tim to do ).
terry

Great pictures!! Thanks.. your biggest fan... :-)
Love ya
~donna

This is just wonderful – amazing and hard to believe – but wonderful. What a blessing for you to be doing something that is truly a labor of love. I’m “green” with envy, not ecology!
Connie

Nora,
This is amazing to watch the progress. Thanks for including me in your updates. Keep them coming!
Cindy

Wow! It looks amazing! I have enjoyed reading your daily update J Sure makes for a good break in the middle of the work day. At any rate – you guys are doing an amazing job and it looks fantastic! I can’t wait to see it in person!! Kenny

I've enjoyed your week! In my boring part of the world, it has been a bright spot. Thanks for sharing!

What a task! I can't imagine. It already looks good -- the end result will be phenomenol.

I think you could make Happy Hour early . . . .
Love,
jessica

Well, the beauty of "blueprints in your head" is that no matter the outcome, you can always claim that is exactly as you planned it!

Thanks for sharing!
Skip

Great pictures! I’m glad this project is coming together; but, I had no doubt. It looks great.

Do have Rhonda and me out sometime to see the project first hand.
See ya,
Tim

How to Disassemble a Log House in Less Than 5 Hours!!


June 8, 2010
The "Queen of de Construction" here! If I owned heavy equipment and had an endless supply of cash, I'd be very dangerous, (and very, very happy)!

Today was a big day and mostly full of surprise that it only took about 4.5 hours to take the house down. It's been standing in a temporary position for the past 3 years,,,,waiting to move. Jason and his band of brothers are amazing. Jason's mastery of lifting the 22.6' logs off with the Sky-Track without a teeter or twitch was fascinating to watch. The easy part is over, tomorrow we start trimming and leveling the end part of the logs and start laying the foundation logs and spiking them together. (I say "we" like I'm out there with chain saw and a hammer in hand,,,not a chance)! Jason will start notching for the electrical and drilling for wiring and then we move on up with the logs to the 2nd (3rd) level and lay in the floor joists. Roof trusses will be here on Thursday.

When I set out to design this house, the non-waiverable condition was that it MUST be green. So, the original floor joists from the 1896 house and all the yellow poplar boards will be used in this house. Jason is getting original floor joists from another old log house, along with 2 old logs to replace rotten ones. I've (with a little help from my baby brother) have hauled beams left over from an old barn to use as part of the post and beam construction in the framed connector between the two houses. We're planning beautiful quarter sawn barn lumber for the oak floors.

As an artist, I see things most don't and see form, texture and color differently. It's exciting for me to think in layers instead of linear for change. Alas,,,,, reality is around the corner and I'll have to get back to thinking like everyone else fairly soon. Until then, I'll be the happy little artist I am.

Platforms and Structures for the New Addition


May 21, 2010
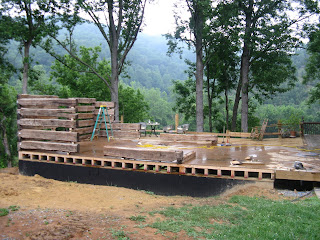
We're making preparation for the log structure and the breezeway (enclosed living space) the log house will be a 3 story addition to our house.
Picture 1 - platform for the log house with a 17.5' foyer with washroom and utility. Large windows and double french doors facing the river from the breezeway and access to 2 covered porches from the log house.
Picture 2 - The hostas are huge! this view is from other side of our house on lower side looking toward barn. Gardens are 20 years in the making.
Picture 3 - textured painted wall - a lesson in faux finishing and texturing to come later..
Picture 4 - I stuccoed the walls with thinset and used 3 glazes, the color changes different shades throughout the day, used tier poles for fascia boards
Picture 5/6 - stuccoed wall with multiple glazes and stains. I love the texture and the rich color.

History of the Original Structure


May 15, 2010
Here's a few pictures of our existing log house and a little history about it and the new addition. I'm sure most of you are wondering why we're adding on. Three years ago, I couldn't have imagined adding on to this house; making a few modifications maybe, but razing and reconstructing another log house, NO! So I thought until I realize the VDOT had plans to burn a log house to make way for a road expansion. Long story short, with the help of Shane Miller, (this is all your fault you know!) I called Tim at work after looking at the house, took a deep breath and told him we've just bought another log house. He didn't say anything for a long time, (I think he was picking himself up off the floor), and said he'd be home later. I'm sure he knows now, the longer it took him to get home, the more reasons I had stacked why we needed this log house. To make a long story short, 3 days later, we had the log house numbered, disassembled and some-what reassembled in front of the barn at our place....Waiting for the next move.

To give you a little history on our house,,the house was built in 2 time periods. The first hosue was built around 1830ish and the second part of the house was added on in 1896. The 1830-ish house acquired by my great (6,7x or so) grandfather as payment for a bad debt in 1870 something and his son, Samuel, built the addition on in 1896. This house was very interesting tearing down, you could see the distinct eras through the different colors and architechural details. The brick were molded and fired on site in an earthen kiln. The bricks are amazing in that they have not deteriorated at all, and you can see the big chucks of carbon in them. I plan on using them in the addition. The clap board and inside wall and floor boards were made of yellow poplar, (these too will be used in the addition). The front porch is very unique in that the design is chippendale,,,,believe it or not. It too is yellow poplar. The value of yellow poplar is that it doesn't rot and bugs don't care for it much.

The house we're adding on is a 1820-30 house, believed to be part of the old Jayne farm, one of the oldest and still intact farms in the area, complete with the original log structures. I have pictures of the original house(s), but I'll have to scan them and add them later.

I hope you will enjoy viewing this blog and feel free to become a follower with your comments. Tell us about your own experiences with these wonderful historical old cabins or houses and their revivals. Looking forward to hearing from you.
Take Care
Nora Belle